We’ve been RVing full time for just about three months.
We started out from Indianapolis in early
September and headed north and west to see
Yellowstone before the snow and
temperatures fell. Alas, temperatures dropped a couple weeks early. We are in a
new 32 ft Class B+ RV that was not rigged for winter camping. So, we pulled out
the Atlas and looked for National Parks where the nights were staying above
freezing. At first, we thought we would stay within striking distance of
Yellowstone so we could return when the weather warmed. We drove down through
Colorado to Utah and started doing the five fantastic parks across Utah’s
southern half. By the time we got across Utah temperatures in Yellowstone had
stayed down and the snow had accumulated. We gave up on going to Yellowstone for the
year, and once again started matching our travel routes to overnight temps.
Now we are into December. We have great friends we haven’t
seen for two years and they have two houses we haven’t seen; one in Reno, one
on Lake Tahoe. Temperatures in both places are below freezing every night, have
been for many weeks. We want to see our friends before Christmas. So we need to
protect our RV against freezing.
Executive Summary on
Wiring DC Tank Blankets – (if you’re in a hurry.)
- Follow tank blanket manufacturer’s prep and
application instructions.
- If you need additional wire, only use a gauge
that is equal or heavier: i.e. 14 or 12 - than the wire on the blankets
- THESE INSTRUCTIONS ARE ONLY FOR DC – BATTERY
POWERED – BLANKETS.
- IF you are hardwiring your 13.8 VDC blankets you can ground the tank
blanket to the frame. DO NOT GROUND 110 VAC blankets to the frame – you will
kill someone!
- Ring terminals are a secure way to fasten the
ground.
- Put a switch – rated the same or higher amps
than the blanket needs – in the power wire. You don’t want to drain your
batteries trying to heat empty tanks or warming the fluids when the weather
isn’t forecast to hit freezing.
- Unplug your RV from shore power and turn off the
generator before you open the power panel.
- Connect the power wire to a DC fuse rated for
the tank blanket.
- Encase your wires in flex plastic conduit. Zip
tie it to the frame here and there – NOT to parts that move (springs,
driveshaft, etc.) or things that heat (exhaust pipe).
- You have wires going through the floor to your
power panel. Ours were encrusted with several inches of expanding foam. My
wife, Maureen, had the good idea of piercing the foam from the top by sliding a heavy duty
14” zip tie along one of the wires. I lay underneath and taped the new blanket wires to the
zip tie and she pulled them up.
Our Home Depot Supplies, things you'll need . . .
 |
| Ring Terminal w/ Shrink Tubing |
 |
| Butt Splice w/ Shrink Tubing |
 |
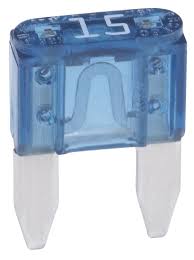
| 15-Amp Automotive-Type Fuse |
 |
| Black All-Weather Duct Tape - GREAT stuff! |
 |
| 15-Amp Dual Switch |
 |
| Split Black 1/2 inch Flex Conduit |
Our fresh water tank is about 35 gallons and is under our
bed aboe the floor. Our Gray and Black water tanks are under the bed and bathroom under
the floor. I don’t know the R-value of our floor, but in the morning when it is
45 degrees outside and the thermostat has been set for 70 overnight, the floor is
often about 60 degrees. Unlike big Class A (bus) motorhomes we don’t have a
basement through which all of our piping, etc. runs. We have a skirt around the
outside. There are storage lockers hanging around the perimeter, accessed through
that skirt. But, under the floor are just cross members that sit on the Ford
chassis and the obligatory driveshaft, axles, exhaust pipes, generator,
levelers, fuel tank and the two waste tanks and dump gates.
I have spent more time scuffing around under our RV than I thought
I would. Yet, during my time in the underworld I learned we don’t have any
exposed water pipes under the floor. The only waste pipes come out of the two
tanks and quickly elbow their way through the gates and out the dump.
We read that some professionals wanted about
$1200 to install DC-onlypads and $1600 for AC/DC pads, (now Back in Black and not warranted for a
Highway to Hell). Nothing inspires us to learn like a reasonable quote from a
trained professional! So, we’ve watched a whole bunch of videos on how to
install heating pads on waste tanks. There are videos and checklists on and by
“UltraHeat”. Everyone’s instructions stopped at “Electrical Installation.”
Late on a Saturday afternoon, powering out of San Francisco
after brunch with a smart, talented cousin and her talented, smart daughter
(kickass volleyballer) we slipped into a
Camping World in Rocklin minutes
before closing. We bought two DC heater blankets for 40 gallon tanks. At about
a hundred dollars apiece we hoped they were what we needed! They were each 12”
x 30” and would draw 12 amps, 12VDC.
We
bought DC pads thinking we would hard wire them into the RV, that we call
Harvey, because we needed to keep the tanks from freezing even if we were away
from shore power, including driving along frozen highways. Because each heating
pad or blanket draws 12 amps, so one 15 amp circuit wasn’t going to do it.

We opened the Power Panel (Under our refrigerator/freezer,
of all places: what if we lose power and ice in the freezer melts and runs down
into . . . the power panel?!) and saw we had two unused fuse positions. Labels
on the panel door told us the two open DC circuits were each rated 30
amps. We have a gray water tank and a
black water tank, both 35 to 40 gallons. They are adjacent to one another,
separated only by the short piping to the common sewer outlet.
A quick note on RV electrical, since a motorhome is the love
child of a house and a truck it has the electrical circuits of both. Basic to
the truck is 12 VDC – batteries. The house begat 110 VAC – the wall outlets of
home. In your RV, those familiar outlets, the microwave and TVs probably run
only on 110V AC (Alternating Current), called “shore” power. The truck –
the part where you sit to drive – the “cab,” the interior lights – all
hopefully LEDs – the fans, porch steps, awning motors, and the controllers of
the furnace and water heater, etc. all run on DC (Direct Current) battery
power.
In the Power Panel (under our freezer/fridge!!!) we have
Circuit Breakers and Fuses. The Circuit Breakers look like what you have at
home. They are resettable and protect the AC side of things. The fuses look
like they belong under the hood of a car and protect the DC side of things.
Each Circuit Breaker and Fuse carries a number rating – 3, 10, 15, 20, 30 –
that’s the maximum number of Amperes (Amps) it will let through on a regular
basis. So, the two 30 amp fuse circuits could each handle the two tank
blankets.
The instructions that follow are ONLY
FOR DC (BATTERY POWERED) tank blankets!!!
Instructions on our Madison
Accessories heater blankets said we should remove power to the pads when the
temperature might drop to the 40s, but there would be no danger of freezing, or
if one or more tanks were empty. The tank blankets have thermostats built in.
When they sense 40° they come on and shut off around 58° F (each +/-5°). We
could have nothing in the black tank and be half full in the gray or vice
versa. So, we decided to switch each individually. That, and I couldn’t find an
attractive > 24 amp switch. We bought a double black rocker switch, each
rated 15 amps, that fit into a single Lutron® style plate. This can sit in
a recessed panel beside our power panel (under the fridge!)
Another side note on RV electrical
– amps is amps. Doesn’t matter if it’s for 110 VAC, 120 VAC, 12 VDC or 13.8
VDC, if it says it’s rated for 15 amps it’s okay for 15 amps of either
persuasion.
Every “Install Tank Heaters” video
or script says to first wash the tank surfaces where you will install the
heaters, let them dry and then wipe them well with isopropyl alcohol and let that
thoroughly dry. Then, when the tank surface is well above 50° F verify
the blankets will fit, remove the both papers, replace the large, outer paper, test
position the blanket, peel away the paper on one end and rub the blanket into
position. We did all that. Our tanks were only 55 degrees by 3PM when I went under to put the blankets
in place.
Once we pressed the blankets onto the tanks we
plugged my wife’s hair dryer into a short, 12 gauge extension cord that was in
turn plugged into the campsite’s power pole, put it on high and warmed the
blankets and the tanks. Once we had them firmly adhered we cut lengths of the
all-weather duct tape and sealed the blanket’s edges.
We took care that the blankets would
wrap around the tanks and that the temperature sensor in the blankets would be
near the lowest point of the tank – where we’d surely have liquid. On the gray
tank we only had about eleven flat inches on the bottom. Luckily, on the
Madison Accessories the blankets are 12” wide, but the heating elements are
only about 10” wide. So, using household scissors we cut the non-electrical
edge of one blanket to fit around the
drain line.
Reading on line and looking under
our motorhome I verified it is okay to run 12 VDC grounds to the chassis frame.
(When you jump a car you put the positive on the battery terminal and then the
negative on the frame of the car, away from the battery. It reduces the chance
of igniting battery gasses.) That, to me, seemed to simplify things a lot. DANGER: You may ONLY ground DC – battery powered – devices to the vehicle frame. Doing that with AC (110) will kill people!!!
At a Home Depot we bought a small
packet of both ring and spade terminals (with shrink tubing), a small packet of
butt splices (with shrink tubing), some 14 ga. primary wire, a package of 11”
zip ties, plastic conduit and all weather duct tape (stylish black, thank you).
The wiring on the blankets is 14 ga. red and black. So, I bought some of each –
red and black. Turns out, we didn’t need the black, because we can ground the DC
blankets to the frame, near to the tanks. We’ll took the black wire back for a
refund. We terminated the two ground wires within a foot of the blankets. I put
a spade terminal on one ground lead and put it on an existing post grounded into
the aluminum under our floor. DANGER:
You may ONLY ground DC – battery
powered – devices to the vehicle frame.
Doing that to AC (110) will kill people!!!
We put a ring terminal on the
other blanket’s ground lead. To do that we separated the red and black wires,
then cut the black ground wire to a generous length, stripped less than a
quarter inch of insulation from the new end, twisted its strands and inserted
them into the terminal. I used a large pair of Channel Locks to crimp the
terminal. Vice Grips also work. My wife, Maureen, carefully and artfully used a
cheap butane fire starter to shrink the heat tubing collar of the terminal. We
drilled a small hole in a frame piece and secured the second ground with a
self-tapping screw through the ring terminal.
We’d bought black, plastic,
flexible conduit, like our RV manufacturer used. Using the butt splices we
added more red 14 gauge wire to the red leads from the blankets. We then fed
the red wires into the conduit before fishing it across the RV under the floor
and above the long Ford frame and fuel tank. We then attached the conduit to the frame at
several points with zip ties.We needed more than one package of flex conduit. We used the black All-Weather tape to join them.
We unplugged the RV from the power
pole outside. I repeat, we completely unplugged the RV from the 110VAC power
pole. We verified the generator was not running. Then, all we had in the RV was 12 VDC
battery power. 12 VDC will burn you or cause a fire. 110 VAC will kill you. Do
not mess with 110 VAC – shore power – unless you know exactly what you are
doing.
Then, inside our RV, we took the
plastic cover from the electric panel. We removed the four screws in the
corners of the electric panel and set it on the floor leaving all the wires
connected. Behind it we could see four flanges holding rubbery, 1”(?) conduit
going through the floor. I went underneath and the bottom ends were hidden in a
lumpy mass of expanding foam the size of a big man’s brogan. My wife, Maureen, had the good
idea of piercing the foam by sliding a heavy duty 14” zip tie along one of the
wires. The Zip Tie plastic is harder than the foam but softer than the insulation on the wires. I lay underneath and taped (that strong duct tape) the wires to the zip tie and she pulled them up.
We had a blank, recessed wooden panel next to
the power panel. We cut an appropriate size opening in that panel, put an “old
work” box in the hole, fed in the wires and attached one to one side of each of
the switches. We then took a short length of red, 14 gauge primary wire and fed
it from the other side of each switch to a connector in the buss bar of the
fuse panel. Then we mounted the switches in the old work box. We attached the
wall plate over the switches and that part was done.
 |
An "Old-Work" box. Less than a dollar at a home center.
Called Old Work because its 'wings' hold it in an existing wall. |
|
|
|
|
|
Making sure the switches were both
off – just to be doubly safe - we inserted a 15 amp automotive fuse into each
holder. Then we remounted the electric panel and its cover.
We went to the motorhome’s
“control panel” and verified we had at least a 1/3 tank of liquid in both the
Gray and Black tanks. I went outside and lay under the motorhome when my wife
flipped the two switches, turning on the heating pads. By now it was late
afternoon and the tanks measured 45
°F. They didn’t come on immediately. I was
concerned they weren’t working, but later in the evening when the temp dropped a
few degrees they were both warmer than the surrounding metal. I went out before 5:00AM with my infrared thermometer to check. Weather Channel said it was 31. Metal apron on our RV was 29 as was a metal pipe near by. The outside of the two blankets were about 34. However the two tanks were in the low 40s. That does it for me. They work!
 |
| The red LEDs glow when it is cold enough outside to demand power for the blankets, but the switches are off. |
To be able to tell which switch was
which Maureen put a tiny dot, with fingernail polish, by the gray tank button
on the control panel and a single dot by the switch powering the gray tank
blanket. She put two tiny dots by the black tank button and switch. (Black tank
has 'number two' in it – get it?)
It’s been a few days and several hundred
miles now and the blankets have stayed connected. We’ve been in areas where its
dropped well below freezing and everything seemed okay. Toilet, shower and
sinks drained. When I had to drain the tanks early one frosty morning, the
“effluent” flowed down the pipes and out of our concern. That’s all I care
about. The
UltraHeat site says tanks with their blankets, properly installed,
are protected to eleven degrees below zero(F)! I hope we don’t try them to that
extreme. I’m not good to eleven below.
Someone more knowledgeable than I
may edit this post. If I made a mistake, I hope they do, and soon. Otherwise,
this worked for us. All total we spent about $275 cash, three hours in
installation and, as usual, endless hours researching what to do. I hope this
made it a little easier for you. Travel well!!!